Navigation: WireCAD Specific CAD Functions > Drawing Cables >
Device to Terminal


|
Navigation: WireCAD Specific CAD Functions > Drawing Cables > Device to Terminal |
|
|
Draw a Cable to a Terminal
Menu: Tools>Cables>Draw Cables
Default keyboard shortcut: CC
Function:
Draw a cable between a device and a Terminal.
|
WireCAD allows you to draw cables between Outputs to Inputs, Inputs to Inputs, and Outputs to Outputs. Bear in mind that the first point of the cable Polyline will be entered in the Project Cables database as the Source for the cable. |
How To: Draw a to a Terminal
Assumes that you've placed the equipment in the drawing.
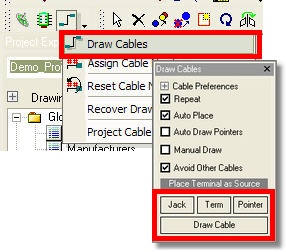
1. Click <Draw Cable> |
|
2. Select the output or Source. Watch the Command Line for prompts.
Note: The special OSnap that appears when you are over a WireCAD Connection Point. |
|
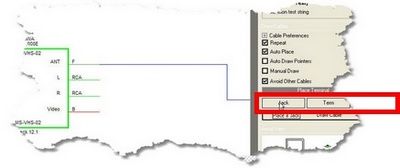
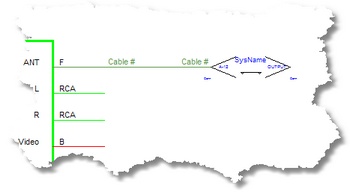
2. Draw from output to the Terminal Switch (Jack, Term, Pointer) of your choice.
Notice that the label above the Terminal Switches changes to Place Terminal as Destination |
|
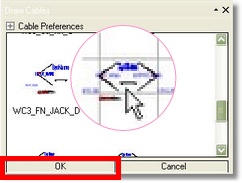
3. Select the Terminal of your choice and click <OK>. |
|
4. With Auto Place turned on, the selected Terminal is placed in the drawing to the right of the output. Otherwise you are prompted to place the Terminal and the cable will be drawn to it. |
|