Navigation: Reporting Functions >
Modifying Existing Reports


|
Navigation: Reporting Functions > Modifying Existing Reports |
|
Use the Design View Tab to enter Edit mode.
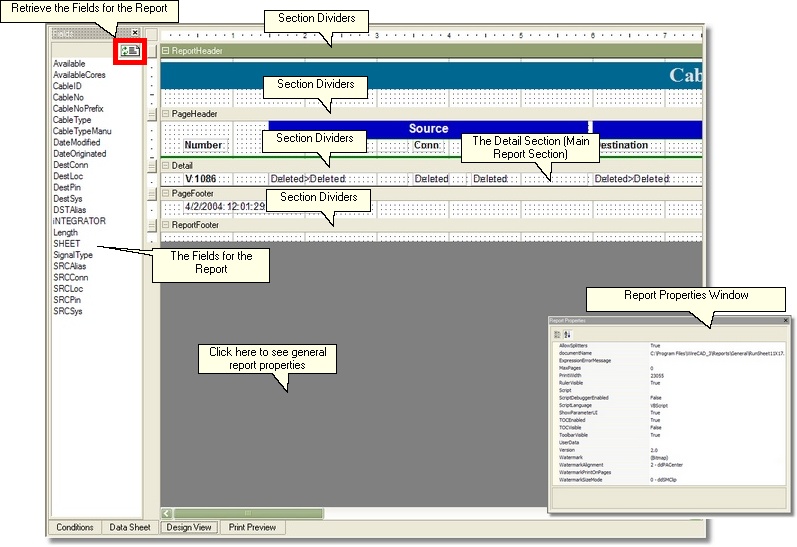
From here you can change the display properties, grouping, and appearance; as well as, saving the modified .rpx file. Within the Design View tab the Page Setup button will display the Report Setup dialog:

Report Properties Dialog Controls Description
Item |
Description |
Paper Size |
Sets the paper size of the report. Default inherits the selected printer page size. |
Margins |
Set the page margins. |
Orientation |
Portrait or Landscape. |
Paper Handling |
Tray options returned by the selected printer. |
Document Name |
Future. |
Summary |
Future. |
Report Sections
The Report Designer permits the grouping of controls by section. Sections can include Header, Detail, Footer. WireCAD also provides additional grouped data sections. These can be added automatically using the New Report Wizard, or by right clicking in the designer and choosing Insert>Group or Insert>Report Header/Footer. The designer must have at least one section named Detail.
Section |
Appears |
Typically Contains |
Report header |
Once per report |
The report title and summary information for the whole report. |
Page header |
Once per page |
Labels that describe detail fields, and/or page numbers. |
Group header |
Once per group |
Fields that identify the current group, and possibly aggregate values for the group (e.g. total, percentage of the grand total). |
Detail |
Once per record |
Fields containing data from the Source record set. |
Group footer |
Once per group |
Aggregate values for the group. |
Page footer |
Once per page |
Page number, page count, date printed, report name. |
Report footer |
Once per report |
Summary information for the whole report. |