Navigation:  Getting Started >

Creating a New Drawing

Previous pageReturn to chapter overviewNext page

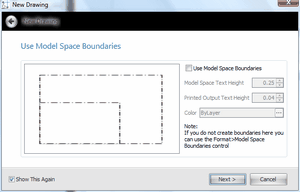
Menu: File>New Drawing, Project Explorer\Current Project\New Drawing

Default command line shortcut: nd

Create a new drawing based on a drawing template, with or without model space boundaries.

Applies To:

All product levels

Related Settings:

None


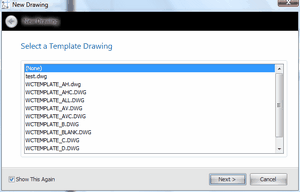
How To: Create a new drawing using the wizard

1.Click File>New Drawing
2.Select a template drawing from which to start
3.Click [Next >]
4.Select boundary settings
5.Click [Next >] to finish


Template drawings are drawings that have been saved in the template drawings folder and already have entities such as page borders, layouts and viewports added to them.


Create Model Space Boundaries. The Model Space Boundaries function takes two arguments, the Model Space Text Height and the desired Printed Output Text Height. Using these two variables in conjunction with the size of the Viewports in each Layout to create  boundary rectangles in the Model space. Each boundary is accompanied by a text description that describes the Viewport and  to which the boundary applies as well as the text heights and scale factor.


Note: You can add Model Space Boundaries later using the Format>Boundaries function

The final step is to name the drawing.

clip0036clip0037