Navigation: CAD Basics > Tools > Blocks, Inserts and Attributes >
Writing a Block to a File


|
Navigation: CAD Basics > Tools > Blocks, Inserts and Attributes > Writing a Block to a File |
|
|
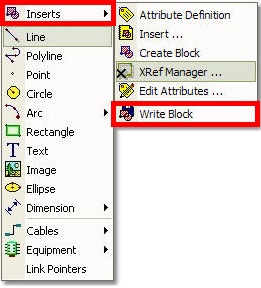
Write Block to File ![]()
Menu: Tools>Inserts>Write Block
Default keyboard shortcut: None
You can export any block to its own file. This is useful to be able to reuse your work. Let's say you spent a bunch of time drafting a title block or page border. You get it just the way you want it. Without the ability to write the block to its own file, you will not be able to reuse your work.
How To: Write a Block to its Own File
1. The block you are going to write out must be inserted in the drawing space.
2. Click Tools>Inserts>Write Block
3. Select the insert. Right-click to continue. If the insert of the block to export is already selected then the function will proceed automatically to the next step.
4. You will be prompted to select the basepoint.
5. Next you will be prompted to enter the name of the new drawing file. Click <Save>.
Done.