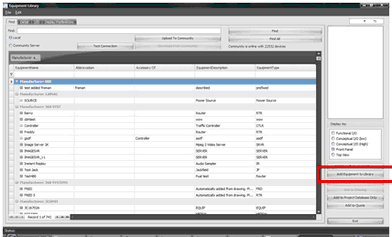
Menu: Database>Equipment Library[Add Equipment to Library]
Default command line shortcut: le
Create a new equipment definition from which to create functional blocks, rack panels, etc.
|
Applies To:
All product levels
Related Settings:
None
|
How To: Add Equipment to the Library
Add Equipment to Library
|
Click Database>Equipment Library
Click [Add Equipment to Library]
|
|
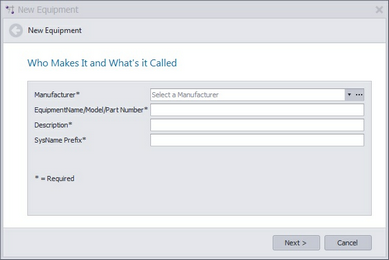
Select or add a Manufacturer.
Enter model/pn/name, description, etc.
Click [Next >]

|
There is always some confusion about the SysName Prefix (Equipment Type) field. Consider the following:
We have two types of video server -model A and model B - that use similar wiring. We may consider using the SysName Prefix - SRVR. Anytime we create an instance of one of these we they will be SRVR-01, SRVR-02, and SRVR-0n. Now consider that model A is not available to use and that we have to install model b instead. No problem. Because they "harness" is named SRVR-n we can interchange Make and Model as needed.
|
|
|
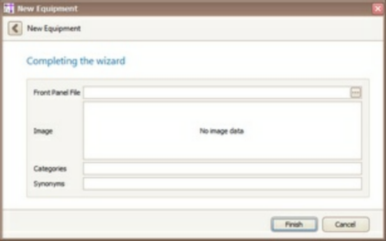
This page is optional, but we recommend filling in the Front Panel File field
|
Filling in the Front Panel File field will make the Rack Builder tool work. Leave it empty and you may be frustrated later.
|
Click [Next >] to add the new definition
|
|
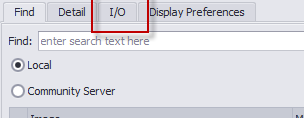
Next we will add some Inputs and Outputs
|
|
Add the I/O by selecting the I/O tab
|
|
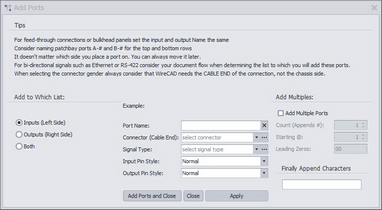
Click [Add Ports]. The Add Ports dialog will appear.
Enter a port name, connector, signal type
Select Inputs, Outputs table or Both
Click [Add Ports and Close] or [Apply] (if you want to leave the form open).
|
|
|
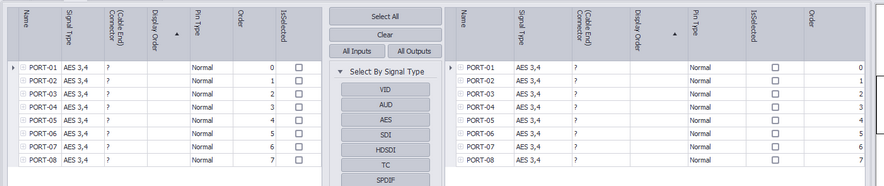
Try adding multiple ports. Enter "PORT-" (leave off the quotes). Select any Connector and Signal Type. Select the BOTH radio button to add to both lists. Now Check the Add Multiple Ports box and enter a Count of 8. Click [Add Ports and Close]. See below.
|
|
|


